Creating the ALU Test Bench
Here is an easy way to understand what we
mean when we say to create a test bench. Think about a new design with two
components, one component is the design that you want to test. The second component
is a mirror image to the test component in which all of the input ports have
changed to output ports and all of the outputs have changed to inputs. The two components are connected through
these mirrored ports. Your task in designing the test bench is to make the
mirrored component generate and verify as many test cases as you can simulate,
until you are confident that you have verified that the design is working
according to the specifications.
In HDL Designer, you can use the Design Manager to automatically generate a skeleton for your test-bench. This will create a new Block Diagram with an instance of the design unit to be tested and a sub-block with ports defined to drive and examine the design units inputs and outputs.
· To create our ALU Test Bench, first open the Design Manager window and select the ALU component from the ALU library. When you have highlighted this component, go to the File/New menu and select Test Bench.
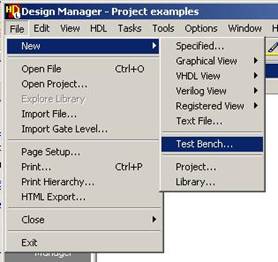
The Create Test Bench window will appear:
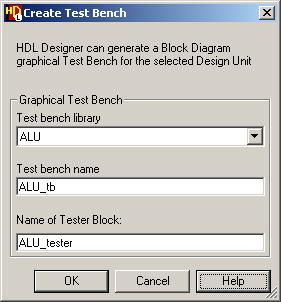
After clicking OK, the Design Browser window will contain a new component called ALU_tb with a Block Diagram view alread created. Open ALU_tb to see a design similar to Figure 2.
Figure 2
Resize and rearrange the two blocks so that it is more readable, as in Figure 3.
Figure 3
Notice that the signals that are output from your design component (in green) have the same name as those which are input into the sub-block called ALU_tester and vice-versa. We have not seen this before, but another feature of the Block Diagram Editor is that signals of the same name are the same signal, even if they are not visually connected together.
Now, let’s being to design the ALU_tester block, descend into this block by clicking on it and selecting a block diagram view from the create new view panel.